https://sweets1327.tistory.com/62
인텔리제이에서 이클립스 프로젝트 사용하기(tomcat 연결)
개인적으로 프로젝트를 할 때는 스프링부트와 인텔리제이를 사용했는데, 회사에서는 이클립스와 서버를 직접 사용했다. 그래서 이클립스 프로젝트를 인텔리제이에서 사용하기 위해서는 추가
sweets1327.tistory.com
개인적으로 프로젝트를 할 때는 스프링부트와 인텔리제이를 사용했는데, 회사에서는 이클립스와 서버를 직접 사용했다.
그래서 이클립스 프로젝트를 인텔리제이에서 사용하기 위해서는 추가적인 설정이 필요하다는 사실을 알게 되었다.
그래서 해당 문제에 직면했을 때 다시는 동일한 고통을 느끼지 않기 위해서 정리하려고 한다.
0. 인텔리제이 버전 : 2022.01 Ultimate
1. Project Structure 설정
2. 설정
3. 서버 설정하기( community 버전은 다른 방법이 필요함 )
4. 빌드 여부 확인
5. 서버 동작
6. 끝
1. Project Structure 설정 ( Ctrl + Shift + Alt + S , File - Project Structure / 원하는 방식 사용 )
- Project 선택 -> Compiler output 위치 설정

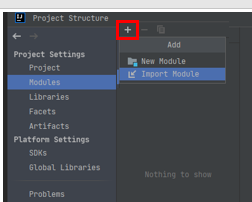
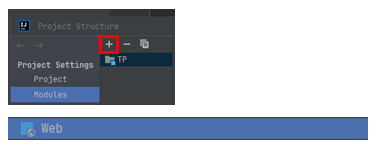
- Modules 선택 -> '+' 버튼 클릭 -> Import Module 선택
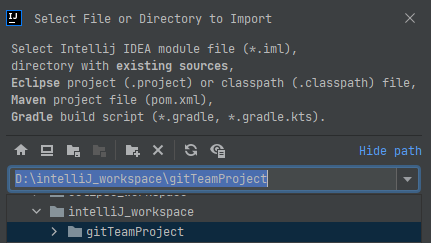
- 임포트할 이클립스 프로젝트 선택
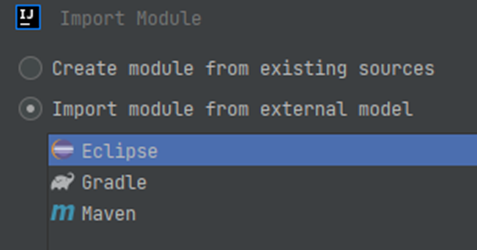
- 이클립스 선택
- Next 클릭(변경할 내용 없음)
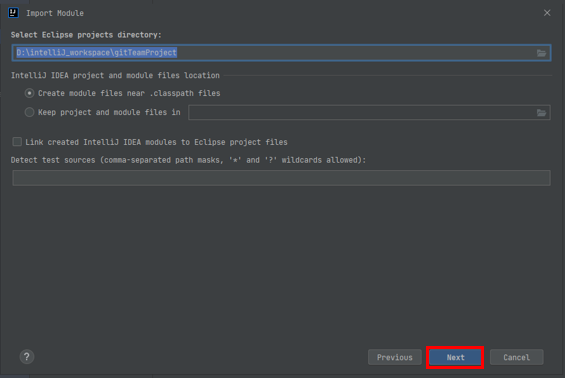
- 이클립스 프로젝트 선택 후 Next 클릭
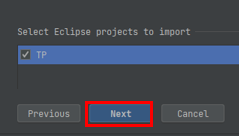
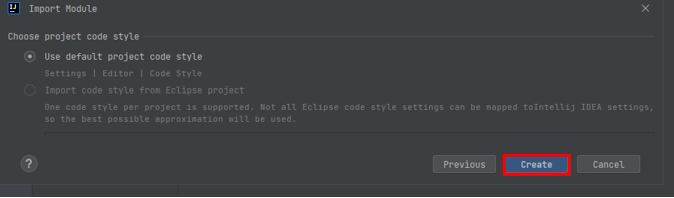
- Create 선택하면 모듈이 생성된다.
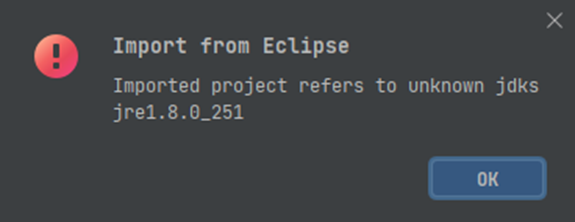
- jdk가 다른 경우에는 이런 알림창이 뜬다. (그냥 끄면 된다.)
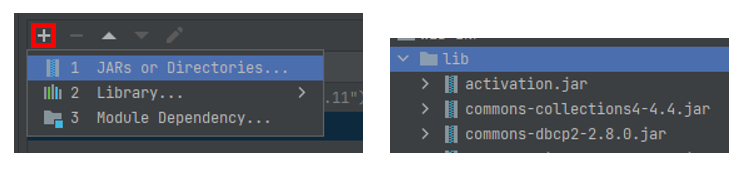
- Dependencies를 선택한 후 해당하는 SDK를 사용하면 된다.(SDK는 JRE랑 동일 개념)
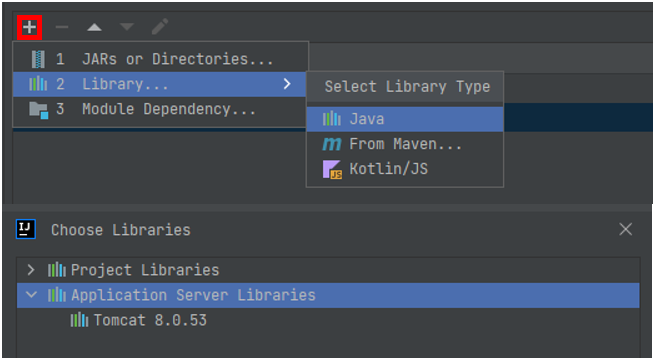
- 빨간색으로 나오는 내용들은 전부 삭제(-버튼 클릭)한 후 원하는 걸 추가(+버튼)하면 된다.
- 개별적인 jar 파일이나 jar 파일들이 저장되어 있는 폴더를 추가하고 싶을 때 사용
- 라이브러리가 존재할 때 사용
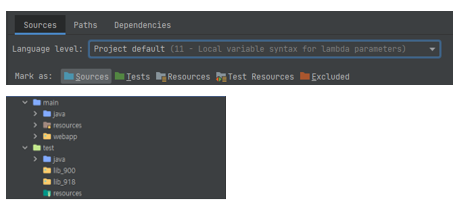
- 모듈에서 소스, language level 설정
- Sources에서 해당 내용들을 설정하는 이유는 log4j, jUnit 사용 시 해당 폴더를 지정하지 않으면 못 찾는 경우가 있기 때문에 설정한다.
- 해당 모듈을 선택한 후 Web 선택
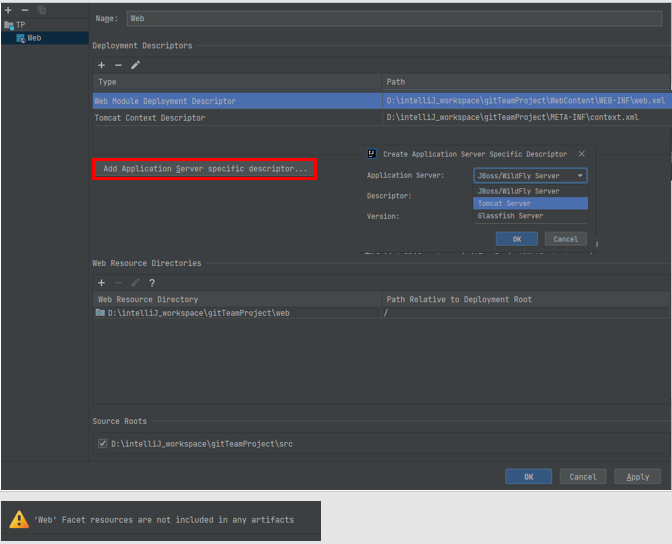
- 1. Deployment Descriptors(수정할 때는 연필 버튼 클릭)
- Web Module Deployment Descriptor은 web.xml 파일 찾기
- TomcatContext Descriptor는 context.xml 파일 찾기
- 2. Web Resource Directories
- 보통 web에서 사용할 Resource 폴더 찾기(보통은 wepapp)
- 3. 오류는 크게 신경 쓰지 않아도 됨
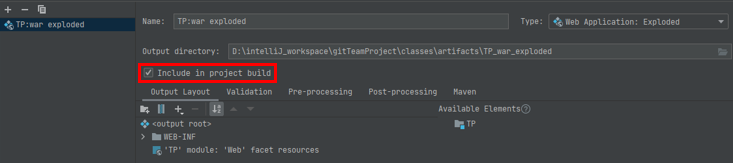
- Artifacts 탭에서 Web Application: Exploded 선택
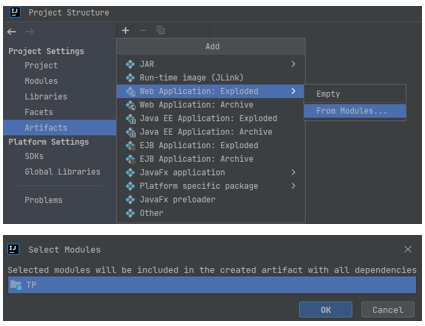
- Include in Project build 선택 후 OK
2. 설정 ( Ctrl + Alt + S , File - Settings / 원하는 방식 사용 )
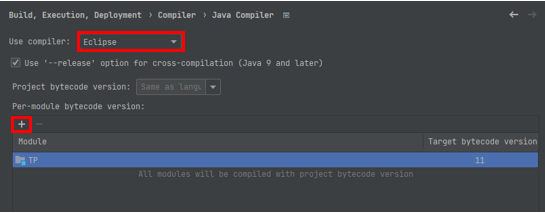
- Java Compiler ( 검색 혹은 Compiler - Java Compiler )
- Use compiler Ecipse 사용
- Per-module bytecode version - 해당 모듈 추가하기
- Annotation Processors
- Enable annotation processing 선택

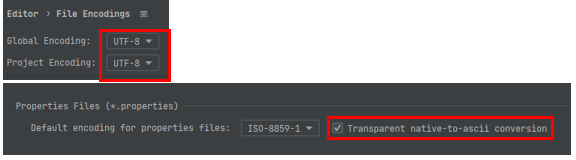
- File Encodings (검색 혹은 Editor - File Encodings)
- Transparent native-to-ascii conversion 클릭(이클립스 properties 파일이 ISO-8859-1, 선택하지 않으면 유니코드 값을 볼 수 있음)
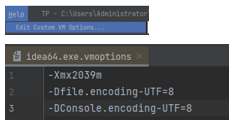
- JVM 인코딩 옵션 설정
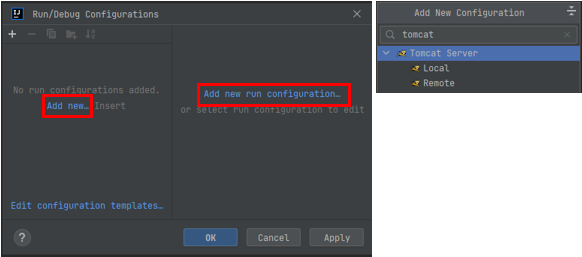
3. 서버 설정하기( Shift 두번 클릭 + edit configurations 검색 혹은 Run - edit configurations 선택 )
- 둘 중 하나 선택한 뒤 뜨는 창에서 tomcat 검색
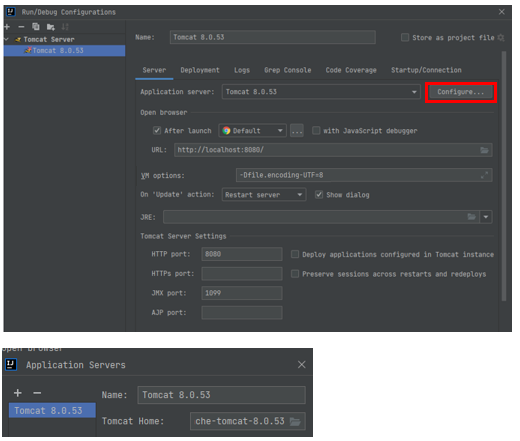
- Server 설정(VM options에 -Dfile.encoding=UTF-8 추가하면 인코딩 설정도 됨)
- Configure 클릭 후 Tomcat 폴더 찾기
- URL : HTTP port + Deployment에서의 Application context 설정값
- VM options : -Dfile.encoding-UTF=8 설정
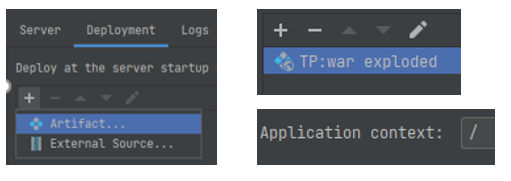
- Deployment 설정( Artifact를 검색 -> 선택, Application context : 시작할 context path를 설정 )
- Rebuild 하기( 프로젝트 우클릭 -> Rebuild Module 선택 혹은 Ctrl + Shift + F9 )

4. 빌드 여부 확인 -> 해당 폴더가 생성되는지 확인( Project Structure에서 설정한 output 폴더 확인해보기 )
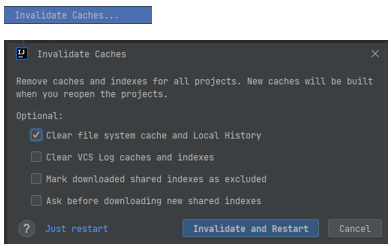
- File - Invalidate Caches -> 캐시 삭제(문제가 있는 경우에 캐시를 삭제 후 다시 빌드)
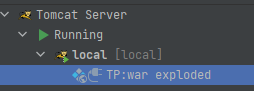
5. 서버 동작(Shift + F10)
- war exploded가 정상적으로 연결되어 있어야 한다.
6. 끝 - 여기까지 설정하면 설정은 전부 끝이 난다.
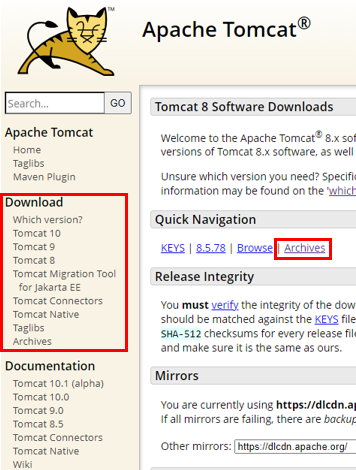
++ 서버 설치
https://tomcat.apache.org/download-80.cgi
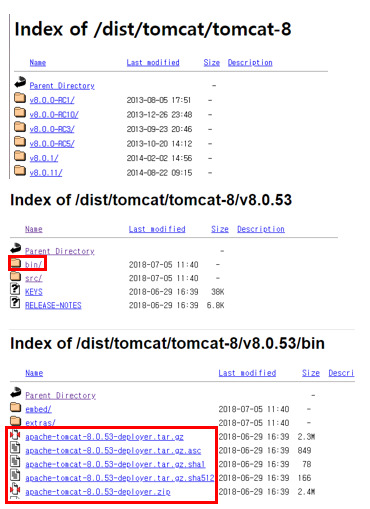
- 원하는 버전 톰캣 설치
- 해당 폴더로 들어가서 원하는 버전 설치
여기까지 읽어주셔서 감사합니다.
빠진 내용이 있을 수도 있습니다. 추가할 내용이 있다면 추가하겠습니다.
출처: https://sweets1327.tistory.com/62 [개발자의 공부 기록:티스토리]
'기타' 카테고리의 다른 글
| [window] 파일명 문자열 바꾸기(파일명 일괄 변경) (0) | 2025.02.28 |
|---|---|
| [sourceTree] 소스 트리 실행 안됨 (0) | 2025.02.20 |
| [IntelliJ] 자동 빌드 설정 (0) | 2023.06.29 |
| Arachni로 웹 보안 취약점 분석하기 (0) | 2023.04.28 |
| 자주 사용하는 PC 단축키 (0) | 2023.01.30 |


