포스팅의 목차는 다음과 같다.
1. 개요 및 설정
1) 개요
2) 설정
2. 실습
1) 테스트 및 이론설명
2) 적용
1. 개요 및 설정
1) 개요
JPA를 사용하는 이유는 아래와 같이 두개의 상황이 있다.
1. DB연동을 위한 SQL을 자동으로 생성해준다. (ex. MyBatis에서는 SQL문을 쓰긴 썼지만, JPA에서는 쓰지 않아도 된다!)
2. JPQL(SQL문의 표준어)을 사용하여 적용하면 다양한 DBMS에 맞게끔 바뀐다.
실무에서는 DBMS를 자주 갈아끼운다고 한다. 이때 매번 SQL문을 다르게 할것인가? JPA를 사용한다면, SQL문을 아예 작성하지 않기 때문에 커넥션만 변경해주면 되므로, 유지보수에 엄청 용이해진다고 할 수 있다.
2) 설정
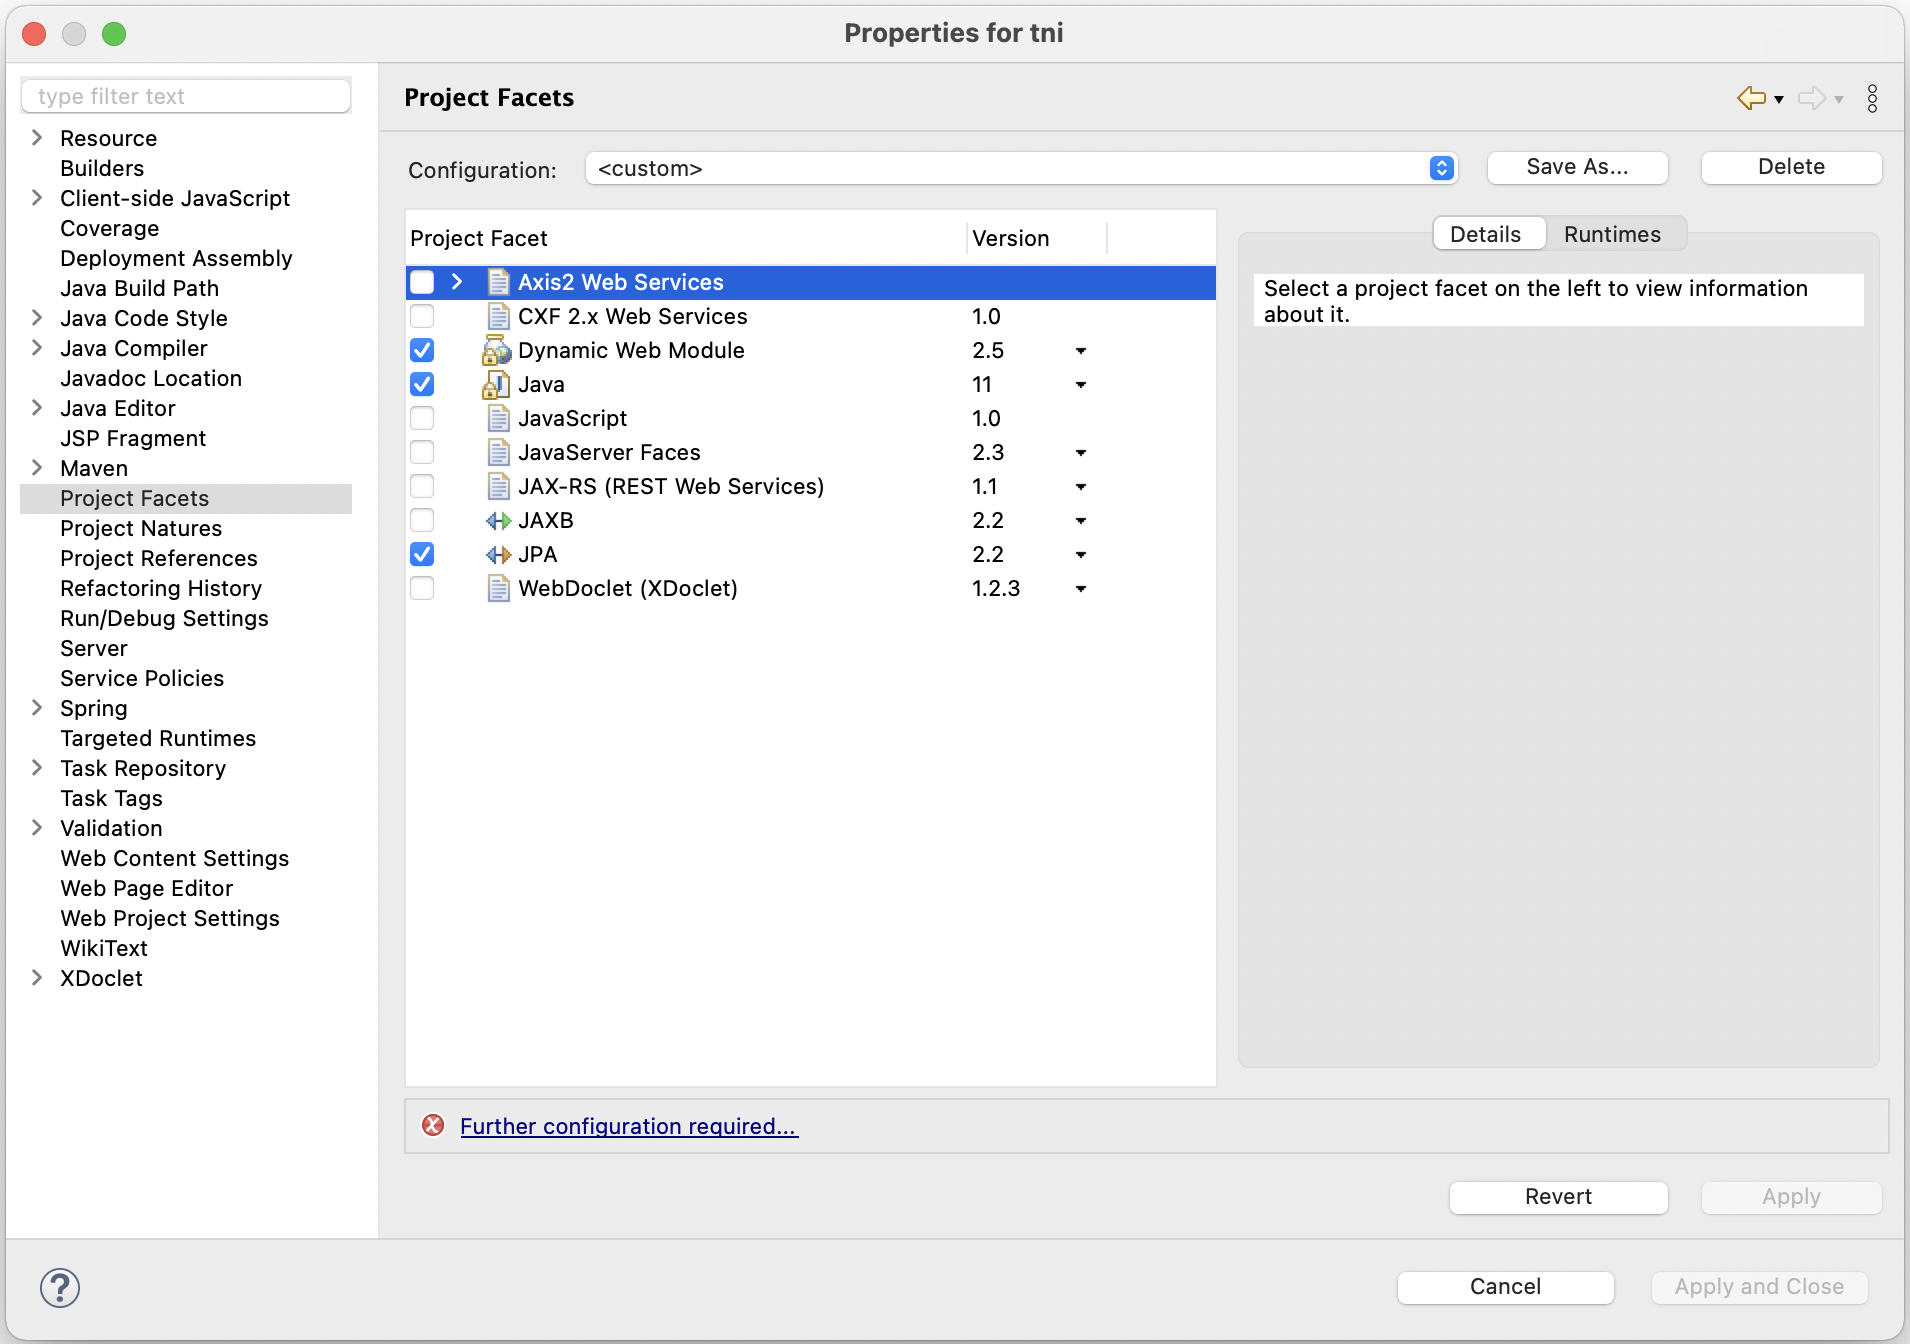
① project설정 변경
프로젝트 우클릭 -> properties -> project facets탭에서 JPA를 선택 -> 버전 2.1로 변경, Apply해준다.
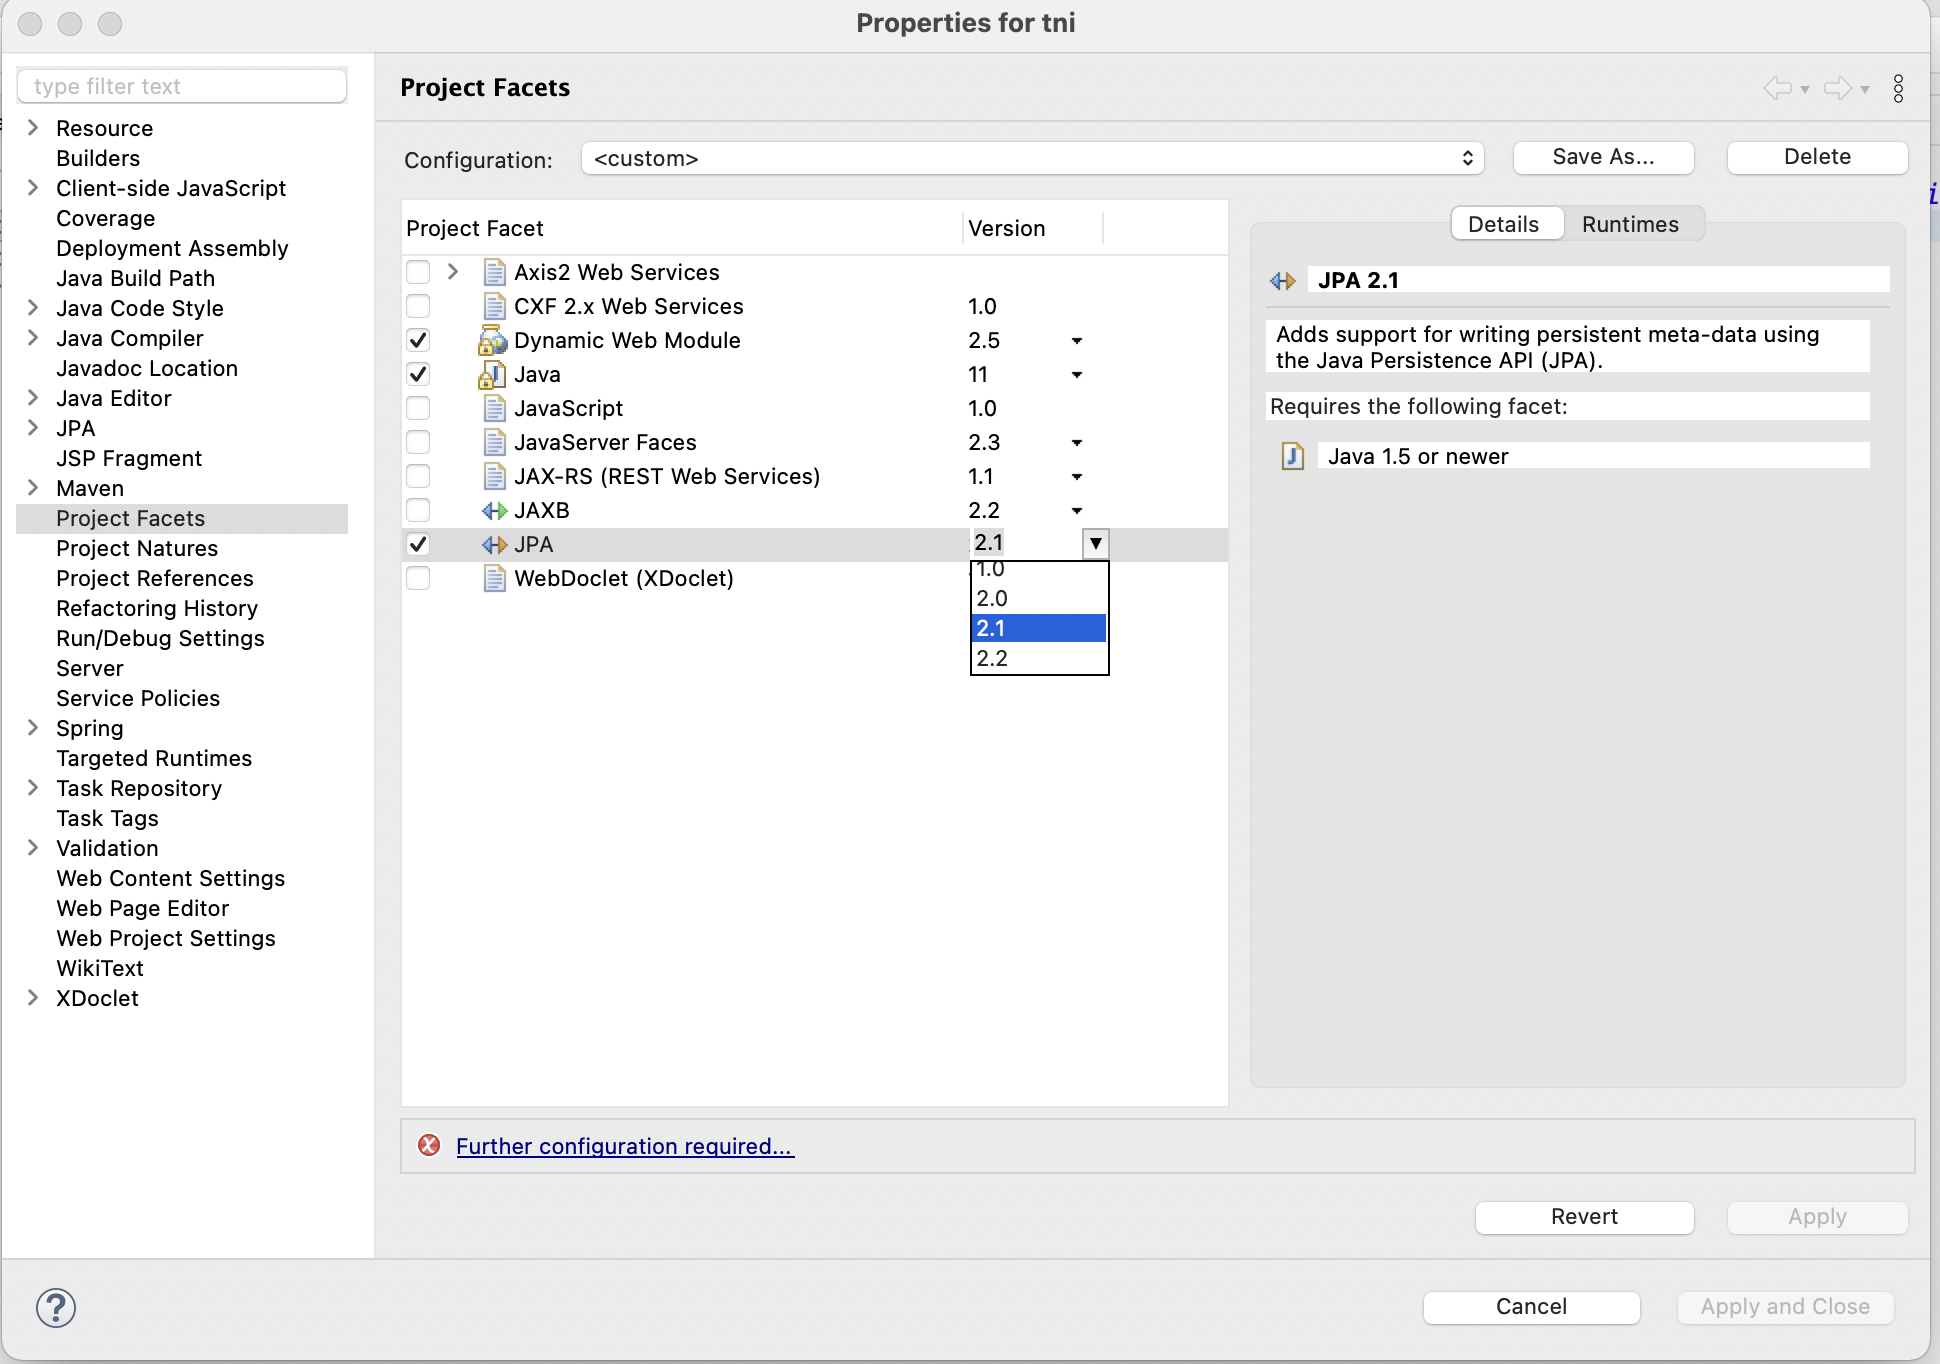
이때 간혹 Apply버튼이 활성화되지 않는 경우도 있는데, 이는 설정내용이 다르기 때문이다. 아래에서 오류 문구가 뜨는 부분을 클릭하면 다른 설정 탭을 확인할 수 있다.
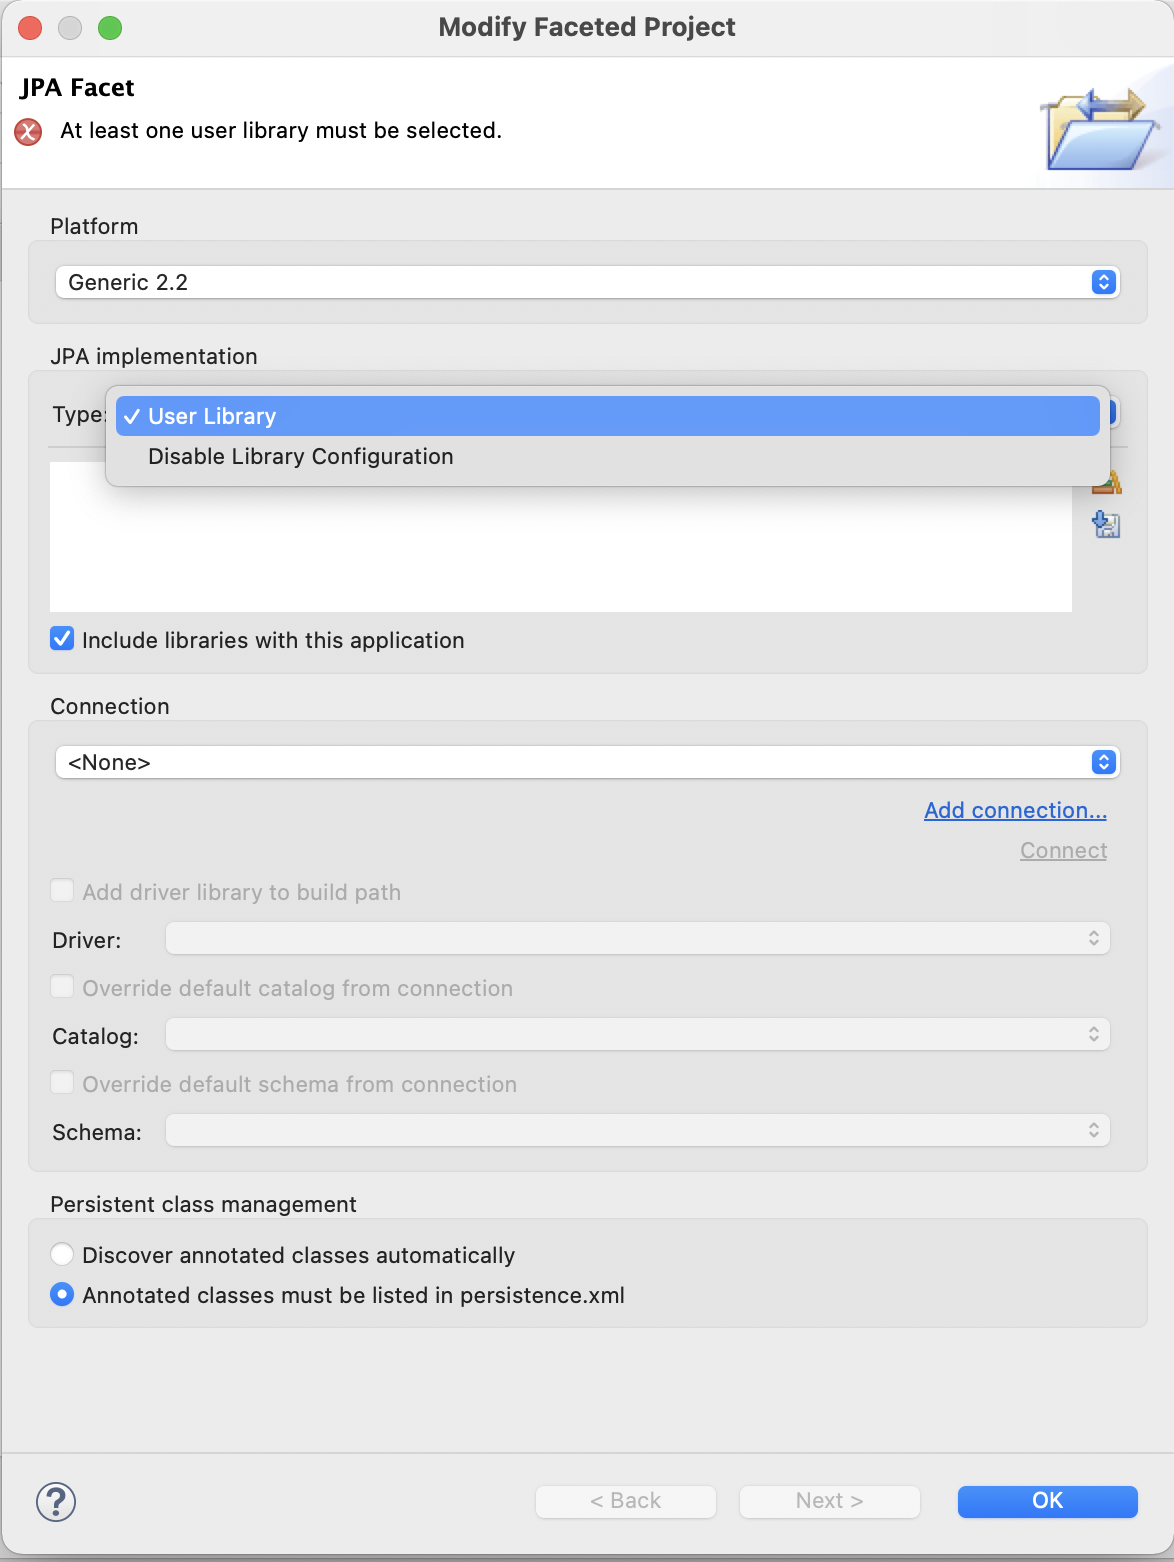
아래의 설정화면에서 JPA implementation 타입을 User Library에서 Disable Library Configuration으로 변경해주면, apply가 활성화 된다.
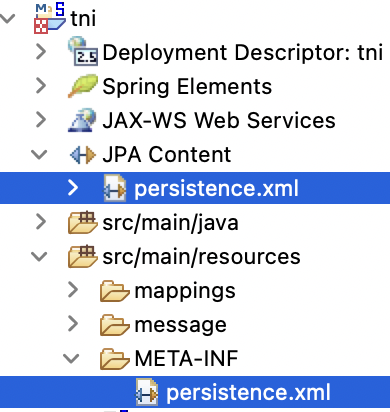
Apply후에 오른쪽 최하단의 초록색 로딩바가 100가 된다면, 아래와 같은 설정 파일이 새로 생성 되는 것을 확인할 수 있다. 이때 빨간 박스로 표시된 부분을 확인하면 자동으로 해당 프로젝트의 이름을 참조하여 생성되어있음을 확인할 수 있다.
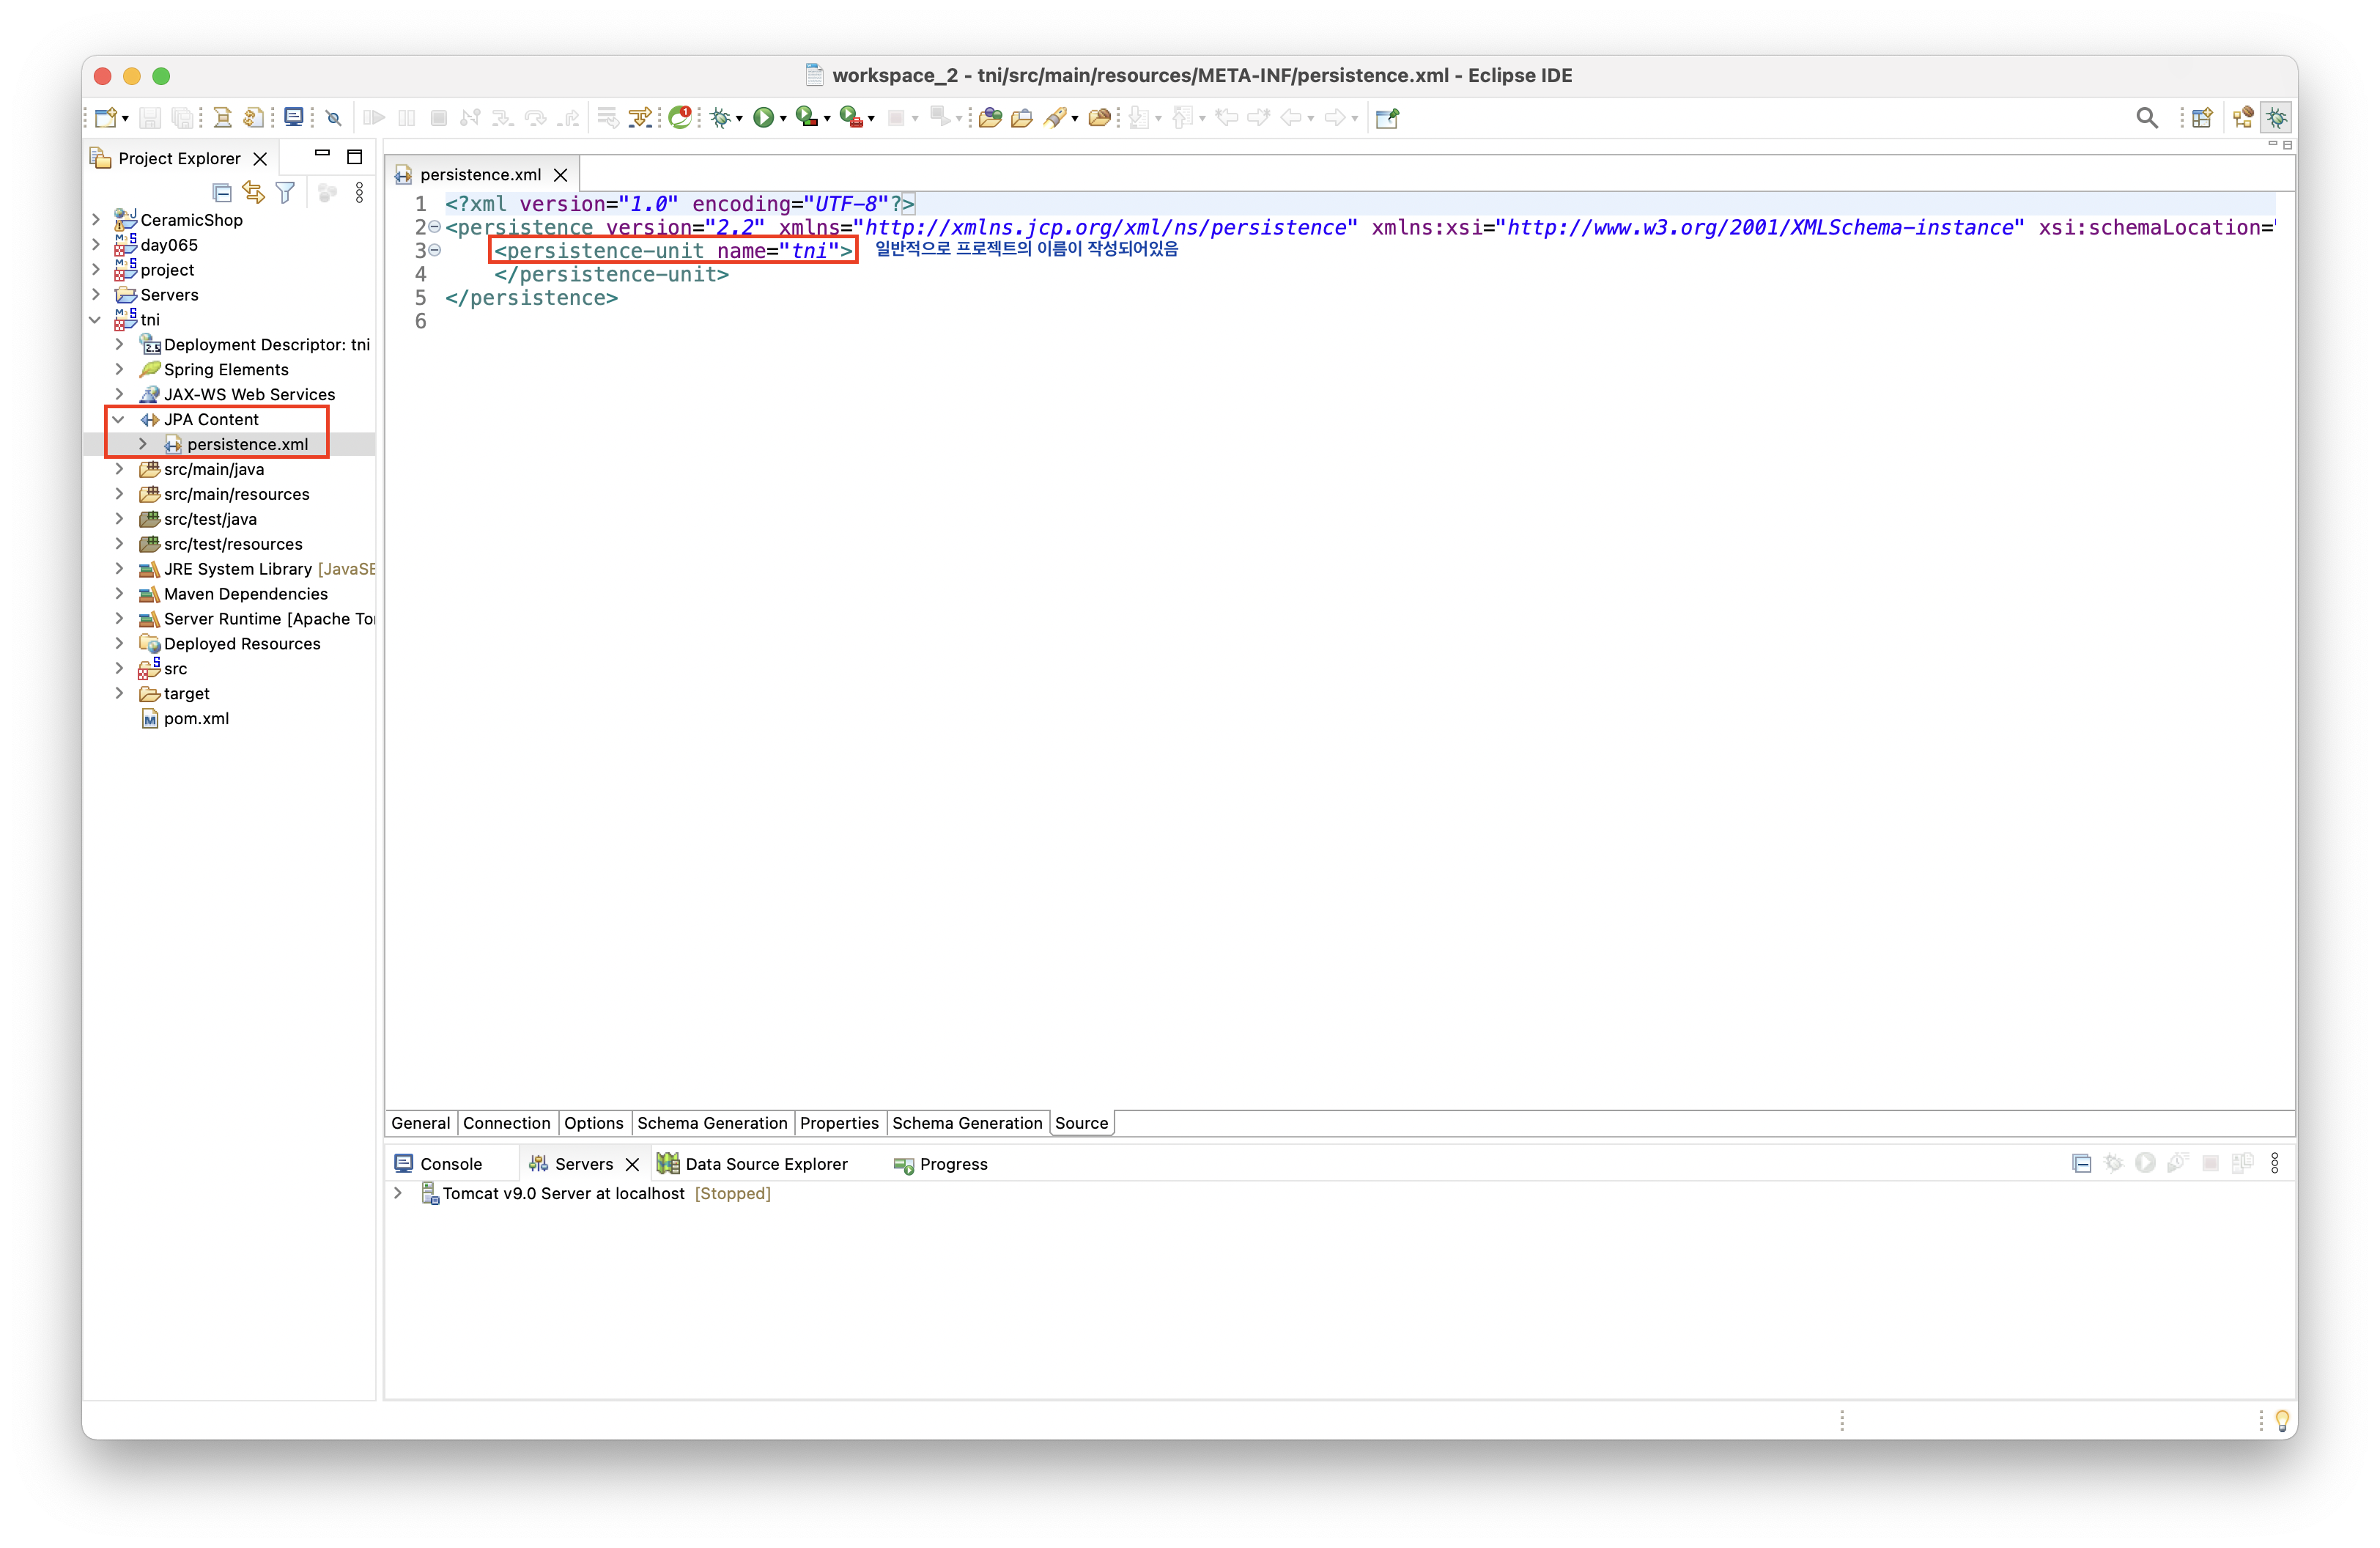
이때 아래의 두 설정파일은 동일한 파일이다.
② pom.xml에 라이브러리 추가
pom.xml에 라이브러리 추가 코드를 작성해주어야한다. 이는 JPA를 실제로 구현해주는 구현체라고 할 수 있다. 코드는 아래와 같다. 설정을 위해 부가 설정 정보까지 추가된 코드이다.
		<!-- Spring -->
		<dependency>
			<groupId>org.springframework</groupId>
			<artifactId>spring-context</artifactId>
			<version>${org.springframework-version}</version>
			<exclusions>
				<!-- Exclude Commons Logging in favor of SLF4j -->
				<exclusion>
					<groupId>commons-logging</groupId>
					<artifactId>commons-logging</artifactId>
				 </exclusion>
			</exclusions>
		</dependency>
		<dependency>
			<groupId>org.springframework</groupId>
			<artifactId>spring-webmvc</artifactId>
			<version>${org.springframework-version}</version>
		</dependency>

	<!-- JPA를 위한 부가설정 -->
	 <dependency>
		<groupId>org.springframework</groupId>
		<artifactId>spring-core</artifactId>
		<version>4.3.2.RELEASE</version>
	</dependency>
	<dependency>
		<groupId>javax.xml.bind</groupId>
		<artifactId>jaxb-api</artifactId>
		<version>2.3.0</version>
	</dependency>
	<!-- ================ JPA실제구현 ================== -->
      <dependency>
          <groupId>org.hibernate</groupId>
          <artifactId>hibernate-entitymanager</artifactId>
            <version>5.1.0.Final</version>
      </dependency>
      <dependency>
         <groupId>org.springframework.data</groupId>
         <artifactId>spring-data-jpa</artifactId>
         <version>1.8.1.RELEASE</version>
      </dependency>
     <!-- ============================================== -->
이때 springContext와 관련된 설정정보가 가장 먼저 읽히도록 함으로써 충돌로 인한 에러를 방지할 수 있다. 순서의 참고를 위해 기존에 존재하는 spring관련 설정 아래에 추가 코드를 삽입할 수 있도록 한다.
정상추가 되었다면 아래와 같이 관련 라이브러리가 추가된 것을 확인할 수 있을 것이다. 이때 정상추가 되지 않았다면, 프로젝트 우클릭-> maven update를 클릭해주면 된다.

2. 실습
이미 생성된 VO에 @를 달아주는 것으로 진행하는 방법이 일반적이기는 하나, 내용의 파악을 용이하게 하기 위해서 아래의 파일을 생성하여 풀이해보았다.
1) 테스트 및 이론설명
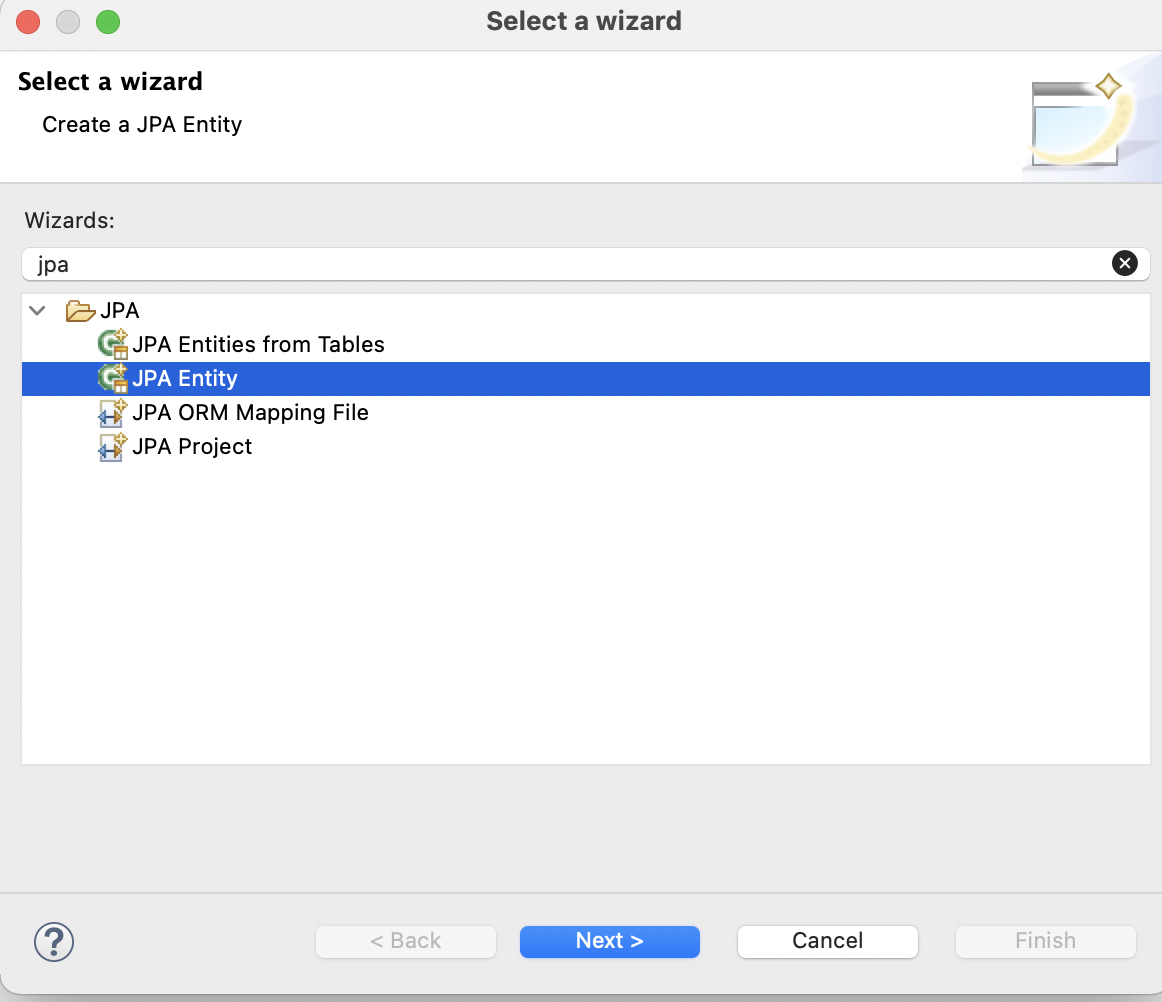
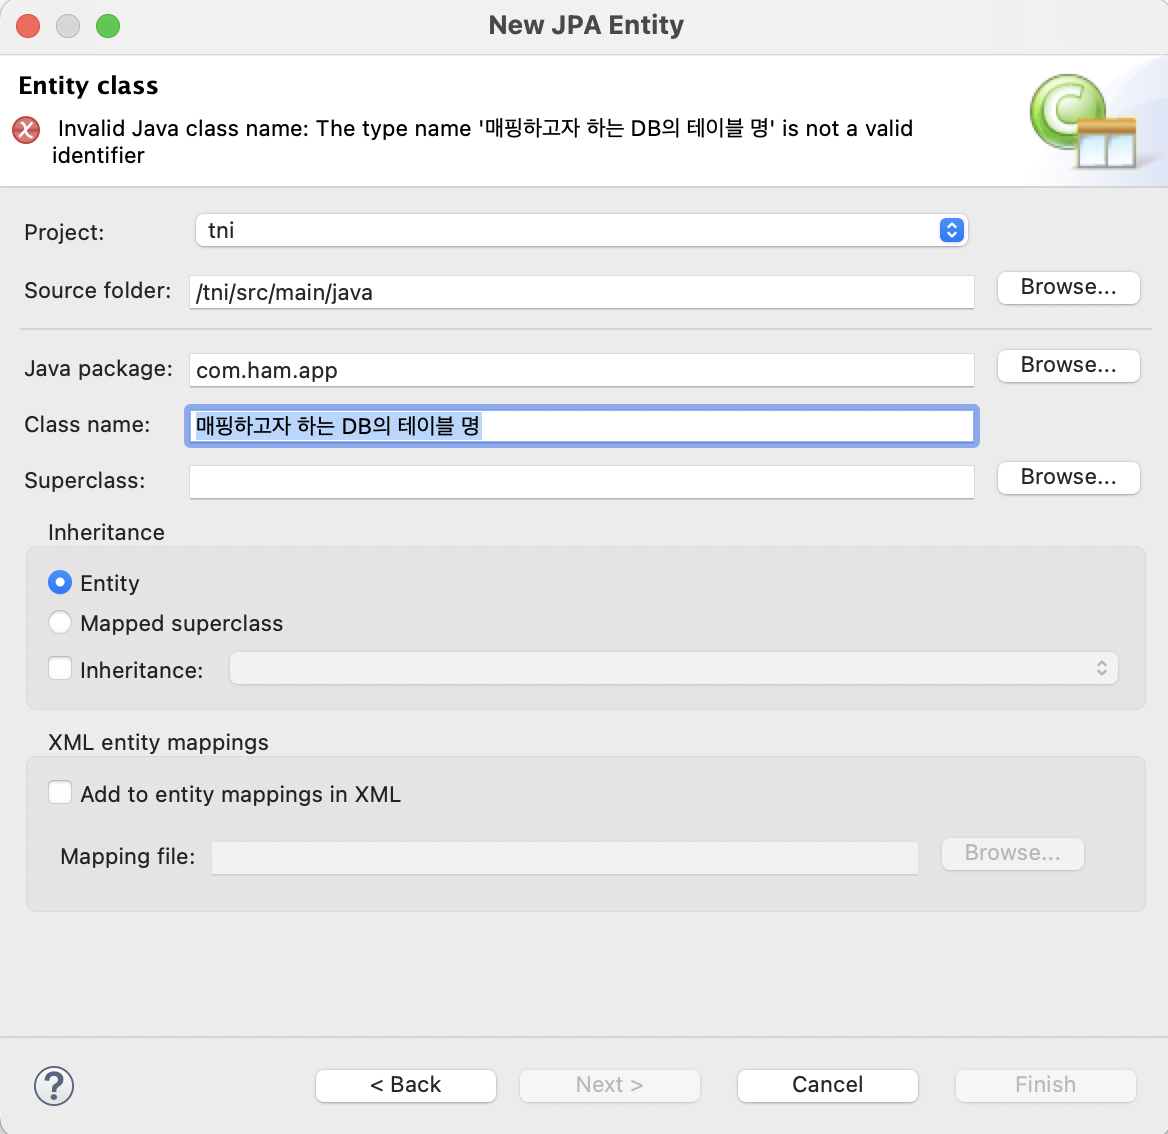
위의 설정들을 통해 JPA Entity클래스를 생성할 수 있게 된다.
이때 파일이름은 내 DB에 존재하는 테이블명으로 작성해줌으로써 자동으로 매핑된다.
xml파일의 내용이 자동으로 추가되는 것을 확인할 수 있다. 정확히는 <class>태그가 추가되었음을 확인하였다.

파일을 생성했을때의 초기 모습이다. 기본 생성자와 @Entity는 필수로 있어야한다. 아래의 코드에 VO코드를 복사해서 가져온 상태로 실습을 진행한다.
package com.ham.app;

import java.io.Serializable;
import javax.persistence.*;

/**
 * Entity implementation class for Entity: article
 *
 */
@Entity

public class article implements Serializable {


	private static final long serialVersionUID = 1L;

	public article() {
		super();
	}

}
JPA Entity의 설정과 관련한 어노테이션에 대해 설명하였다.
@Entity는 엔티티 클래스가 반드시 가져야하는 어노테이션이다.
@Table("DB테이블명-대문자이다.")어노테이션을 사용하여 어떤 DB테이블이랑 매핑할건지를 설정할 수 있다.
@Column(name="TITLE", length=길이설정 가능)을 통해 테이블 속성명과 멤버변수명이 다르면 이걸로 매핑이 가능하며, 그 외 부가적인 설정 속성들이 존재한다. -> JPA어노테이션 컬럼이라고 검색만해도 내용이 많이 나온다.
@Transient를 달아주면 된다. DB테이블에 존재하지 않는 컬럼명, 즉 자바 로직에서만 사용하는 멤버변수는 상단에 달아주어야한다.
@Id라는 어노테이션을 통해 해당하는 멤버변수가 pk라는 것을 알린다.
@GeneratedValue는 PK를 자동적으로 생성해주는 어노테이션이다. Java를 위한 설정이 아니라, SQL로 컬럼값을 자동증가 하고싶다면 작성한다.
@Temporal(TemporalType.형식)를 통해 date타입의 상단에 작성해줄 수 있다. "형식"의 부분에 DATE(다양한 형태가 존재한다. 이때 DATE는 yyyy-mm-dd의 형식이다.)등을 사용할 수 있다.
위의 내용을 모두 포함하여 작성된 코드는 아래에 첨부하였다.
package test;

import java.io.Serializable;

import javax.persistence.Column;
import javax.persistence.Entity;
import javax.persistence.GeneratedValue;
import javax.persistence.Id;
import javax.persistence.Table;
import javax.persistence.Transient;

import org.springframework.web.multipart.MultipartFile;

/**
 * Entity implementation class for Entity: Board
 *
 */
@Entity // 엔티티 클래스가 반드시 가져야하는 @
@Table(name="BOARD")
public class Board implements Serializable {

   private static final long serialVersionUID = 1L;

   public Board() {
      super();
   }

   @Id // 엔티티 클래스가 반드시 가져야하는 @
   @GeneratedValue
   private int bid; // pk
   @Column(name="TITLE")
   private String title;
   private String writer;
   private String content;
   @Transient
   private String searchCondition;
   @Transient
   private String searchKeyword;
   @Transient
   private MultipartFile uploadFile;
   private String filename;
   //@Temporal(TemporalType.DATE) // yyyy-MM-dd
   //private Date regDate;
   public String getFilename() {
      return filename;
   }
   public void setFilename(String filename) {
      this.filename = filename;
   }
   public MultipartFile getUploadFile() {
      return uploadFile;
   }
   public void setUploadFile(MultipartFile uploadFile) {
      this.uploadFile = uploadFile;
   }
   public String getSearchCondition() {
      return searchCondition;
   }
   public void setSearchCondition(String searchCondition) {
      this.searchCondition = searchCondition;
   }
   public String getSearchKeyword() {
      return searchKeyword;
   }
   public void setSearchKeyword(String searchKeyword) {
      this.searchKeyword = searchKeyword;
   }
   public int getBid() {
      return bid;
   }
   public void setBid(int bid) {
      this.bid = bid;
   }
   public String getTitle() {
      return title;
   }
   public void setTitle(String title) {
      this.title = title;
   }
   public String getWriter() {
      return writer;
   }
   public void setWriter(String writer) {
      this.writer = writer;
   }
   public String getContent() {
      return content;
   }
   public void setContent(String content) {
      this.content = content;
   }
   @Override
   public String toString() {
      System.out.println("BoardVO 로그: "+filename);
      return "BoardVO [bid=" + bid + ", title=" + title + ", writer=" + writer + ", content=" + content + "]";
   }

}
JPA의 핵심 설정파일인 persistence.xml에서 추가 설정을 해줄 수 있다.
커넥션을 확보할 수 있는 정보를 기술해주어야한다.
<properties>
	<!-- Spring이랑 연결하고 싶은데, DataSource를 쓰면 설정정보가 이미 다 존재한다! 아래 내용들 다시 안 적어도 된다!! -->
	<property name="javax.persistence.jdbc.driver" value=""/>
	<property name="javax.persistence.jdbc.url" value=""/>
	<property name="javax.persistence.jdbc.user" value=""/>
	<property name="javax.persistence.jdbc.password" value=""/>
    	<!-- JPQL을 사용했을때 필요한 설정! -->
	<property name="DBMS전용 통역사" value="오라클, 마이에스큐엘에 따라 달라진다."/>
</properties>
이때 아래의 주석에 해당하는 코드는 DBMS마다 value값이 다르게 적용되기에, 적절한 값을 부여하여 사용해야한다. name의 부분에는 pom.xml에서 라이브러리로 추가한 JPA구현체에 대한 내용이다.
아래의 링크는 현재 사용중인 구현체 hibernate는 각 DBMS마다 value를 어떻게 설정해줄 수 있는지에 대한 내용의 포스팅이 담긴 링크이다.
https://logical-code.tistory.com/126
[JPA] Dialect(방언)
세상엔 많은 데이터베이스 제품이 존재하고, 각각의 제품은 표준 SQL(ANSI SQL)을 제외한 독자적인 기능을 위한 SQL도 존재한다. SQL Server : ANSI SQL + T-SQL Oracle : ANSI SQL + PL/SQL 기타 등등... 그리고..
logical-code.tistory.com
hibernate의 설정을 추가하여 다양한 명령이 가능하다. 대표적인 두가지로만 예시를 들어설명해보자면 아래와 같다. 옵션이기에 생략해도 무관하다. 주로 크롤링할때 많이 이용된다.
<!-- 자동 생성된 SQL문을 콘솔창에 로그로 출력해주는 설정 -->
<property name="hibernate.show_sql" value="true">

<!-- 테이블 관리 설정도 넣어줄 수 있다. -->
<property name="hibernate.hbm2ddl.auto" value="아래에서 설명">

update-> 만약 들어오는 내용의 컬럼이 달라지거나 하면 내가 작성하려고 한 컬럼으로 수정해줘
Create-drop -> 서비스가 실행되는 동안만 테이블을 사용하고 말경우
Create -> 기존테이블이 있니? 있으면 지우고 다시 만들어줘
2) 적용
간단히 이론적인 부분을 다루었으니 spring과 연동하기 위한 내용에 대해 정리해보았다.
① 기존의 VO에 어노테이션 달아주기
package com.test.app.board;

import javax.persistence.Entity;
import javax.persistence.Id;
import javax.persistence.Table;
import javax.persistence.Transient;

import org.springframework.web.multipart.MultipartFile;

@Entity
@Table(name="BOARD")
public class BoardVO {

	private static final long serialVersionUID = 1L;
    public BoardVO (){
    	super();
    }

   @Id
   private int bid; // pk
   private String title;
   private String writer;
   private String content;
   @Transient
   private String searchCondition;
   @Transient
   private String searchKeyword;
   @Transient
   private MultipartFile uploadFile;
   private String filename;
   public String getFilename() {
      return filename;
   }
   public void setFilename(String filename) {
      this.filename = filename;
   }
   public MultipartFile getUploadFile() {
      return uploadFile;
   }
   public void setUploadFile(MultipartFile uploadFile) {
      this.uploadFile = uploadFile;
   }
   public String getSearchCondition() {
      return searchCondition;
   }
   public void setSearchCondition(String searchCondition) {
      this.searchCondition = searchCondition;
   }
   public String getSearchKeyword() {
      return searchKeyword;
   }
   public void setSearchKeyword(String searchKeyword) {
      this.searchKeyword = searchKeyword;
   }
   public int getBid() {
      return bid;
   }
   public void setBid(int bid) {
      this.bid = bid;
   }
   public String getTitle() {
      return title;
   }
   public void setTitle(String title) {
      this.title = title;
   }
   public String getWriter() {
      return writer;
   }
   public void setWriter(String writer) {
      this.writer = writer;
   }
   public String getContent() {
      return content;
   }
   public void setContent(String content) {
      this.content = content;
   }
   @Override
   public String toString() {
      System.out.println("BoardVO 로그: "+filename);
      return "BoardVO [bid=" + bid + ", title=" + title + ", writer=" + writer + ", content=" + content + "]";
   }
}
이때 persistence.xml 태그에 참조될 클래스명을 해당 클래스로 아래와 같이 변경해주어야한다.
<?xml version="1.0" encoding="UTF-8"?>
<persistence version="2.2" xmlns="http://xmlns.jcp.org/xml/ns/persistence" xmlns:xsi="http://www.w3.org/2001/XMLSchema-instance" xsi:schemaLocation="http://xmlns.jcp.org/xml/ns/persistence http://xmlns.jcp.org/xml/ns/persistence/persistence_2_2.xsd">
	<persistence-unit name="tni">
		<!-- 클래스 참조 -->
		<class>com.ham.app.vo.BoardVO</class>

		<!-- MySQL통역사 -->
		<properties>
			<property name="hibernate.dialect" value="oorg.hibernate.dialect.MySQL5InnoDBDialect"/>
			<property name="hibernate.show_sql" value="true"/> <!-- 로그를 위한 설정 -->
		</properties>
	</persistence-unit>
</persistence>
② applicationContext.xml
설정파일에 진행하게 될 행동들을 스텝으로 구분하여 정리하면 아래와 같다.
1. jpaVendorAdapter클래스 생성
2. entityManagerFactory클래스를 생성
3. 2에 Datasource를 주입해서 커넥션을 확보
3. 2에 jpaVendorAdapter를 주입
아래에서 JPA와 관련된 내용의 코드를 확인할 수 있다.
<?xml version="1.0" encoding="UTF-8"?>
<beans xmlns="http://www.springframework.org/schema/beans"
   xmlns:xsi="http://www.w3.org/2001/XMLSchema-instance"
   xmlns:p="http://www.springframework.org/schema/p"
   xmlns:context="http://www.springframework.org/schema/context"
   xmlns:aop="http://www.springframework.org/schema/aop"
   xmlns:tx="http://www.springframework.org/schema/tx"
   xsi:schemaLocation="http://www.springframework.org/schema/beans http://www.springframework.org/schema/beans/spring-beans.xsd
      http://www.springframework.org/schema/context http://www.springframework.org/schema/context/spring-context-4.2.xsd
      http://www.springframework.org/schema/aop http://www.springframework.org/schema/aop/spring-aop-4.2.xsd
      http://www.springframework.org/schema/tx http://www.springframework.org/schema/tx/spring-tx-4.2.xsd">

   <!-- DataSource 설정 -->
   <bean id="dataSource" class="org.apache.commons.dbcp.BasicDataSource" destroy-method="close">
      <property name="driverClassName" value="oracle.jdbc.driver.OracleDriver" />
      <property name="url" value="jdbc:oracle:thin:@localhost:1521:xe" />
      <property name="username" value="kim" />
      <property name="password" value="1234" />
   </bean>

   <!-- JPA 연동 설정 -->
   <bean id="jpaVendorAdapter" class="org.springframework.orm.jpa.vendor.HibernateJpaVendorAdapter" />
   <bean id="entityManagerFactory" class="org.springframework.orm.jpa.LocalContainerEntityManagerFactoryBean">
      <property name="dataSource" ref="dataSource" />
      <property name="jpaVendorAdapter" ref="jpaVendorAdapter" />
   </bean>

   <!-- Mybatis 설정 -->
   <bean id="sqlSession" class="org.mybatis.spring.SqlSessionFactoryBean">
      <property name="dataSource" ref="dataSource" />
      <property name="configLocation" value="classpath:sql-map-config.xml" />
   </bean>
   <bean class="org.mybatis.spring.SqlSessionTemplate">
      <constructor-arg ref="sqlSession" />
   </bean>

   <!-- 트랜잭션 관리자 클래스 등록 -->
   <bean id="txManager" class="org.springframework.jdbc.datasource.DataSourceTransactionManager">
      <property name="dataSource" ref="dataSource" />
   </bean>
   <tx:advice id="txAdvice" transaction-manager="txManager">
      <tx:attributes>
         <tx:method name="get*" read-only="true" />
         <tx:method name="*" />
      </tx:attributes>
   </tx:advice>
   <aop:config>
      <aop:pointcut expression="execution(* com.test.app..*(..))" id="txPointcut"/>
      <aop:advisor advice-ref="txAdvice" pointcut-ref="txPointcut" />
   </aop:config>

   <!-- JdbcTemplate 생성 -->
   <bean id="jdbcTemplate" class="org.springframework.jdbc.core.JdbcTemplate">
      <property name="dataSource" ref="dataSource" />
   </bean>

   <context:component-scan base-package="com.test.app" />
   <aop:aspectj-autoproxy></aop:aspectj-autoproxy>

</beans>
③ DAO 4 생성
아래 코드를 통해 어떤 메서드로 SQL문이 매핑되고 수행되는지를 확인할 수 있다.
package com.test.app.board.impl;

import java.util.List;

import javax.persistence.EntityManager;
import javax.persistence.PersistenceContext;

import org.springframework.stereotype.Repository;

import com.test.app.board.BoardVO;

@Repository("boardDAO")
public class BoardDAO4 {

	@PersistenceContext
	private EntityManager em;

	public void insertBoard(BoardVO vo) {
		System.out.println("JPA: insertBoard() 호출됨");
		em.persist(vo); // pk값을 해당 DBMS에 맞게 자동생성 -> @GV ★
	}
	public BoardVO getBoard(BoardVO vo) {
		System.out.println("JPA: getBoard() 호출됨");
		return (BoardVO)em.find(BoardVO.class, vo.getBid());
	}
	public List<BoardVO> getBoardList(BoardVO vo) {
		System.out.println("JPA: getBoardList() 호출됨");
		return em.createQuery("from BoardVO b order by b.bid desc").getResultList();
	}
	public void updateBoard(BoardVO vo) {
		System.out.println("JPA: updateBoard() 호출됨");
		em.merge(vo);
	}
	public void deleteBoard(BoardVO vo) {
		System.out.println("JPA: deleteBoard() 호출됨");
		em.remove(em.find(BoardVO.class, vo.getBid()));
	}
}
멤버변수인 EntityManager상단에는 @Autowired가 아니라 @PersistenceContext를 달아주어야한다.
remove(delete)의 경우 where과 같은 맥락으로 사용된다면 find를 써야한다.
createQuery는 표준에서 멀어질수록 작성하게 된다.
-> 매핑하는 것 만으로 자연스럽지 않을때! 여기서 jpql을 사용하게 된다. 여기서 b는 BoardVO를 부르는 별칭이다!
'Spring' 카테고리의 다른 글
| [Boot] 스프링부트 기초 + 데이터 유효성 검증 (0) | 2022.04.25 |
|---|---|
| [Boot] Spring Boot 설치 (0) | 2022.04.23 |
| [Mybatis] Mybatis설치 및 개요_DAO3 (0) | 2022.04.18 |
| 다국어 처리 : 국제화 (0) | 2022.04.13 |
| 이미지 업로드 + 예외처리 (0) | 2022.04.12 |


